Tuesday, December 13, 2016

Basic Watercolor Washes Tutorial

I hope you enjoyed my tutorial on "Watercolor Techniques".
Today's post will cover some easy watercolor washes that come handy every time you pick up your brush to start a painting.


I have come up with a fun little project for you. All you need to do is gather the following supplies and follow the tutorial!

You will need:
Watercolor paper/ Sketchbook
Watercolor paints
Paint brush
Water

Flat wash
A flat wash is a wash that is completely even in tone. Mix a generous amount of cerulean blue wash in your palette. Load a clean brush and apply a smooth wash across the page. Working quickly, reload your brush again and continue where you left off. Try to avoid any variation in tone and if you are working on a large paper, I'd recommend you use a bigger brush.

Flat wash


Gradated wash
It is a wash that is applied in a similar manner as the flat wash but there is a variation in tone. Load your brush with orange paint and apply a smooth wash across the page. Then add more water as you work your way down so that the color gradually gets lighter. Similarly you can add more of the same pigment to the wash so that it gradually becomes darker in tone.

Gradated wash

Variegated wash
This is a variation of the gradated wash but instead of adding more water you gradually introduce another color. This is great for when you are painting sunsets.

Variegated wash

Wet on wet wash
This is can be done in two ways. Load brush with clean water and wet the entire area. While the paper is still wet, apply paint. Dropping gorgeous colors on to damp paper is an exhilarating experience as you can never predict exactly what will happen or how far the paint will spread on paper. 
Wet on wet

Another way to do a wet on wet wash is to add paint to a wash that has not yet dried. This creates interesting mixes of color. 

Wet on wet

Wet on dry wash
This is pretty easy. Just load your brush with wet paint and apply it to dry paper. The resulting wash will have harder edges as compared to a wet on wet wash.

Wet on dry

Dry on dry wash
With as little water as possible (water should only slightly moisten the brush), load your brush with hookers green. Then holding the brush at an angle drag it across the page. This wash is good for creating texture like when you want to paint grass, rocks or textured walls.

Dry on dry

Dry on dry

Dry on dry

I hope you enjoyed learning these basic watercolor washes. You can also check out my Watercolor Valentine Heart tutorial and see how I have used some of these washes there.


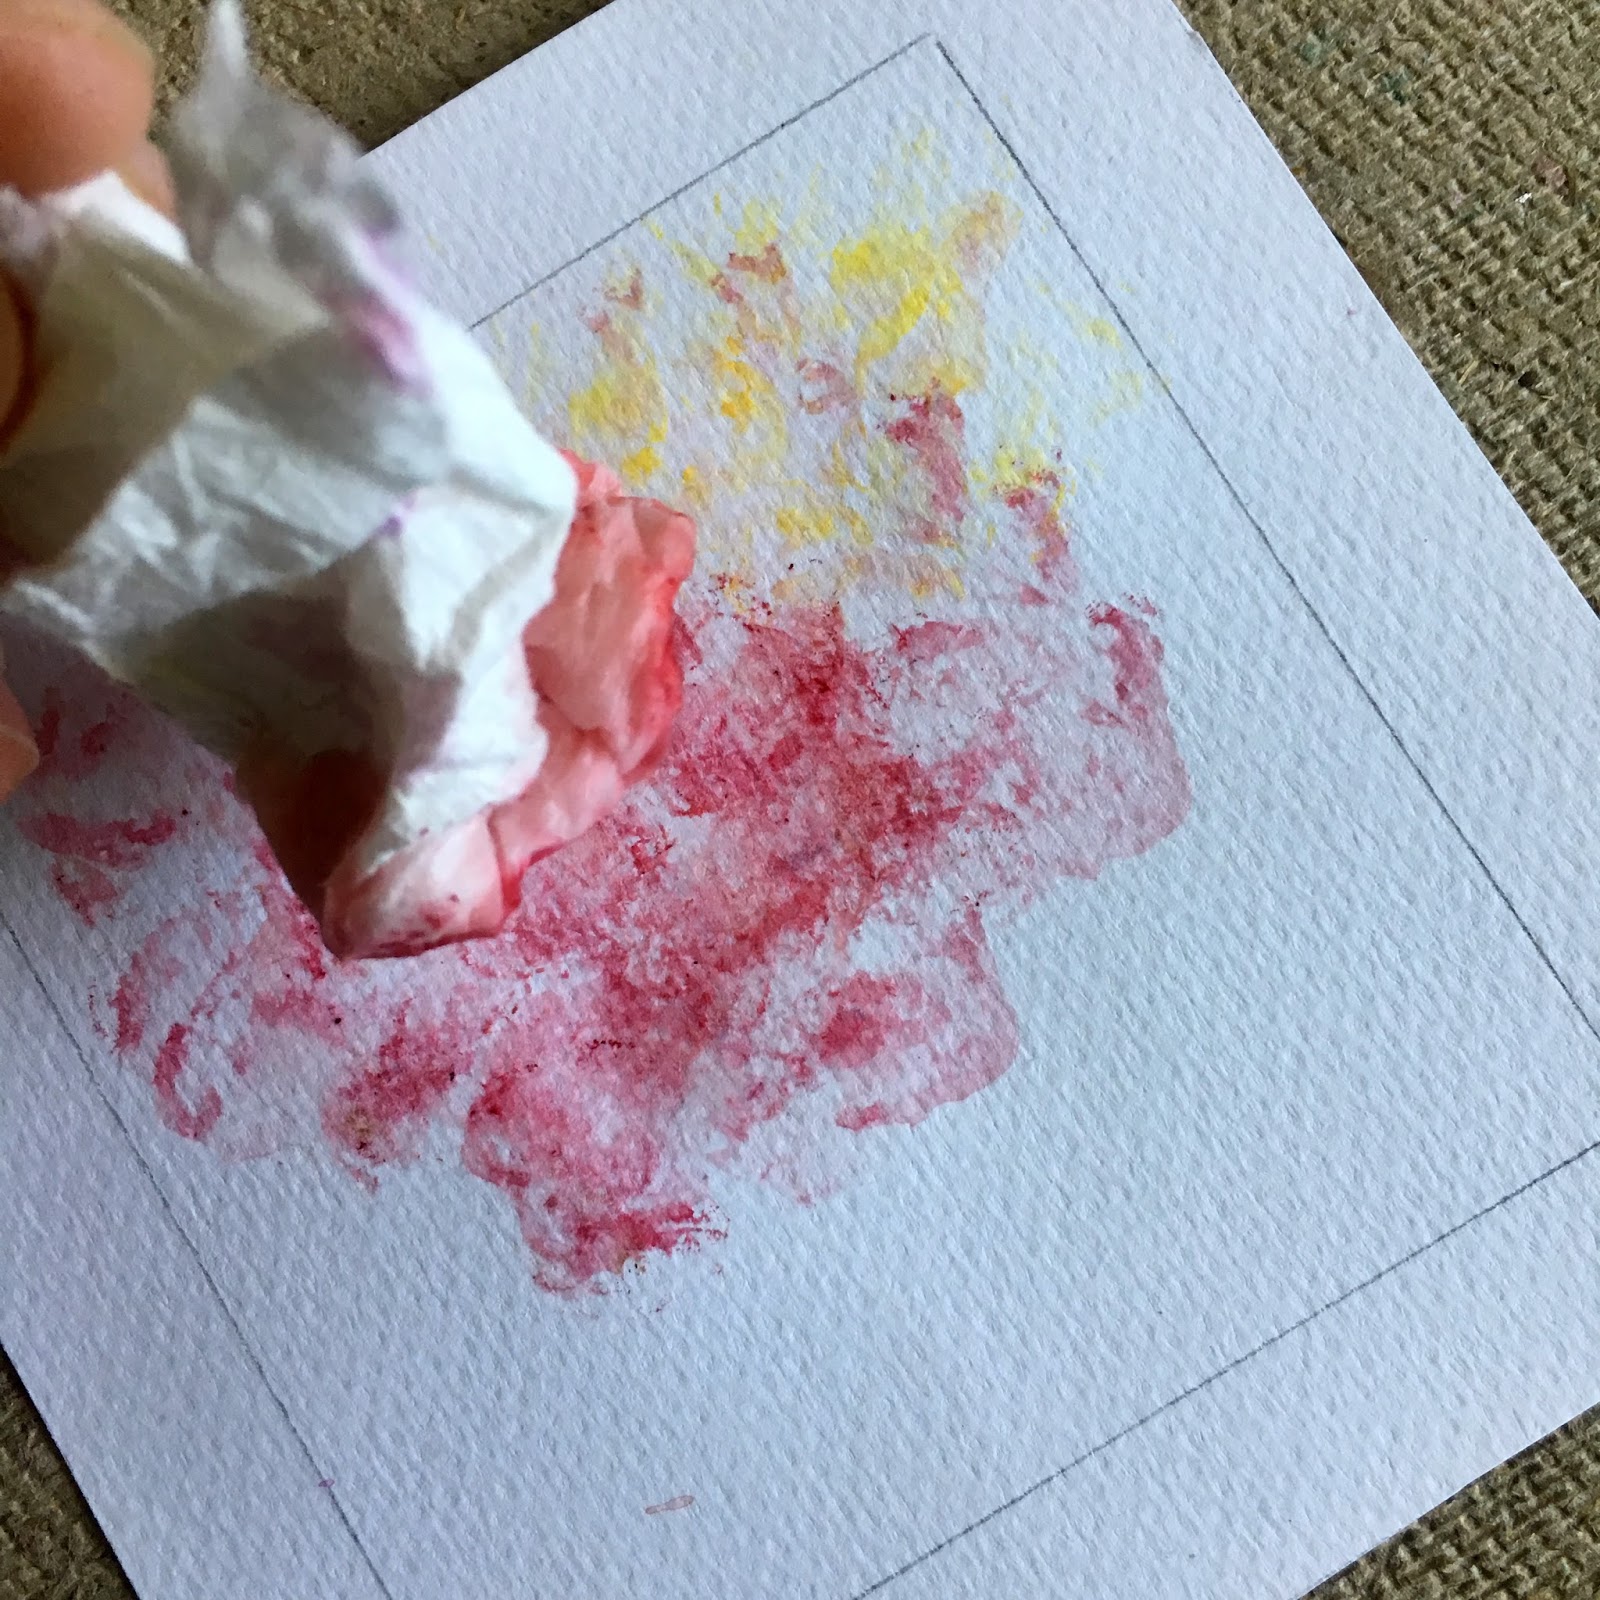
And when you combine some of the basic washes with watercolor texture techniques you can create something like this:

Teapot

Any questions about this post or Watercolor Techniques Tutorial? I'd love to read your feedback! 


Cheers until next time :)

Friday, November 18, 2016

Free This Is Our Happy Place Printable

I love having art in my home. How about you? I plan to slowly dress up the blank walls with personal artwork and prints.  I also want to create a gallery wall in the kitchen. Or a little artsy corner in my lounge. And I would love to have this quote up somewhere!


It brings a smile to my face every time.

I had planned to letter this quote inside a hand painted floral wreath. But when you have a little toddler on the loose, things don't always go according to your plan.


So I went on Pinterest and searched for free watercolor  florals and came across these shared by lovely Lucy of Craftberry Bush . I used Photoshop to add in my quote and voila I have a perfect printable art for my home! And since I love you guys so much for reading my little blog and following me on Facebook and Instagram, I decided to share it with you for your own personal use! All you need to do is to headover to link below to download and it will be all yours 😄

TAKE ME TO "THIS IS OUR HAPPY PLACE" PRINTABLE

I hope you like this and cheers until next time! 
xx

Friday, November 11, 2016

Wisteria Painting

Wisterias
Aren't they stunning?


I wanted a floral painting for my bedroom wall, to go just above my bedside table. I came across lovely wisteria paintings on my Instagram feed and instantly fell in love with this beautiful plant with its stunning purple flowers. I decided to do a wisteria painting and add a little personal touch to my bedroom.

I had a small canvas lying around, perfect size for what I had in mind. I used Pinterest to surf for a reference photo and did the painting in acrylics.

Later, I decided to do another wisteria painting, but this time in watercolors. I tried to paint with a looser and more abstract style, a style that I found more challenging. You can check out my work in progress photos below.


And here is the finished painting. 


What style of painting do you find challenging? Leave me your answers in the comments! 

xx

Monday, November 7, 2016

Watercolor Texture Techniques Tutorial

Ready for a watercolor tutorial?
Let's start with something fun!
Like textures.


Those wonderfully gorgeous textures created just by dripping, sponging, splattering, and more.

So let's have fun exploring some of the ways you can create texture and add interest to your painting. 

But before we begin, gather the following supplies -
Scrap paper cut into 4 inch squares
Paints
Paint brush
Toothbrush
Salt
Cling wrap
Tissue paper

Salt
Lay a very wet wash of ultramarine. While the wash is still wet drop in yellow and orange. Then quickly sprinkle some salt. Brush off the salt when the paint dries.


Splattering
You can make splatters using either your paint brush or a toothbrush. Both will create different effects. Simply load your brush with paint, then holding it close to paper use your fingers to flick the bristles of the brush. Add different colors for a fun effect.


Brush Splatter
Toothbrush Splatter

Dripping
Load your brush with lots of water and paint. Hold the brush directly above your paper and let the paint drip down on to the paper. You can tilt or blow on it with straw for some cool effects.


Sponge
I used kitchen paper for this. Dip your kitchen paper in some wet paint. Then dab it on to paper. You can play by adding different colors.


Cling wrap
Brush on a wash of paint and while it is still wet place a crinkled piece of cling wrap on top and press it down with your fingers. Allow it to dry before you remove the cling wrap.


You can combine more than one technique to add that extra oomph to your work. Have fun exploring these techniques!

xx


Friday, November 4, 2016

Exploring And Trying Out New Art Materials

When your little one is down for her nap,
You take out your new art materials and experiment.


Or read that book you borrowed from the library but never managed to get past the first page!

Recently I tried working with smooth watercolor paper. It's perfect for pen and ink and paintings that don't require much layering.


You can check out how I painted these carrots here and leaves here.

And I also tried to do calligraphy.


I love to try new art materials. What new materials have you tried recently? 

Monday, October 31, 2016

Bird Themed Birthday Cake Recipes

As promised I am back with the two most amazing cake recipes EVER.


In my last post I shared the details of my daughter's bird themed first birthday party and a lot of freebies. In case you missed it, click here.

I baked two cakes for the event since I didn't want to get in to the hassle of making a tiered one. I knew how I wanted them to look, I just needed a cake recipe. 

I decided to use different recipes for both the cakes. For the fondant cake I followed Robyn Stone's "The Best Chocolate Cake Recipe {Ever}". I came across it on Facebook ( I don't remember who posted it, perhaps one of the food pages that I follow). Robyn shared this recipe a few years back on her blog and she is still receiving a lot of positive comments! 


I am SO GLAD I followed it. It is definitely my go to cake recipe from now. The cake turned out soft, moist and simply DELICIOUS. I LOVED it and so did all my guests who got to taste this cake.The compliments just kept on coming 😄😄😄 And so did requests for the recipes!


Since this was my first time working with a fondant, I decided to go with ready-to-roll fondant icing. I used it to cover the cake, for birds, lettering and bunting. As easy as it was to make the birds and rest of the decorations covering the cake with fondant was a pain. They make it seem so easy in tutorials. I covered the "faults" with fondant decorations :p 


For my Bird Nest cake, I followed Maham Alavi's Chocolate Malt Cake recipe. It tastes amazing once refrigerated and cold. I used Kellogg's all-bran original to create the nest. Simply melt some dark chocolate and add it to a cup and a half of cereal. Then working quickly form the chocolate cereal mixture into a nest. Keep it in fridge for a couple of hours to set. Once set fill the nest with Cadbury mini eggs :)


CLICK HERE for the Best Chocolate Cake recipe.
CLICK HERE for the Malt Cake recipe.

 xx

Friday, October 28, 2016

Little Birdie Themed Birthday Party With Free Printables

YOU GUYS
I have been dying to share this with you!


You know how much I love diys.
And how much I love to do party decor on a budget.
Like this one here.
And here.

So when Inaya was turning one, I wanted her first birthday to not only be special but also memorable - involving lots of home made decorations and home baked goodness. Why go store-bought when you can go all-out diy, right? I decided to keep "Little Birdie" as the main theme (after all she is called chirya (birdie) by her beloved Aunt. I also wanted the colours to be soft, so I picked soft blues and pink and designed her birthday card.


I got chart papers and some lovely patterened papers from the craft store and used them to create the decor. I started out by designing the "Happy Birthday" banner.


Followed by "I am 1".


I used a styrofoam to create "1" sign


And used random boxes, toilet paper cardboard rolls and plastic cups to support some of the decor on the table. I found a really nice template for small bird house here and created my own for the bigger ones.


I made cute little buntings and tied them to skewers.


I designed toppers for the cupcakes on Photoshop, printed them out on normal printer paper and taped each to a toothpick. 


Some of the props for photo booth I designed on photoshop myself and the rest I found online.


Once I was done with the decor I got working on the desserts. Since we had invited a lot of people for the event, and having never baked for so many people before I decided to do two cakes instead of a tiered one. Besides, assembling a tiered cake seemed too complicated. I already knew how I wanted  the cakes to look so I just needed an awesome recipe for both.


Luckily the recipes I followed turned out amazing. Both the cakes were soft, moist, luxurious and simply DELICIOUS. I kept receiving compliments on how amazing they tasted! (Will share recipes in my next post)


It was a great party. We all had fun especially the little one.

If you are planning to throw a bird themed party for your little one or for someone you love, then you have come to the right place. Get clicking below for awesome freebies and don't forget to link back :)

 xx


click here to download "photobooth"