
Wednesday, February 11, 2015


Tuesday, February 10, 2015
Watercolor Valentine Heart Tutorial
Yes, it's almost that time of the year again...

So how about something quick and easy?
That involves paper and paints..
And is also HANDMADE.

And let's paint them in three different ways: wet-on-wet, ombre and striped.
.JPG)
To check out V-day projects we have done in the past, click on an image below:


For this project you will need:
Scrap papers for your heart stencil/ heart template
1 x 5.5" by 5" piece of watercolor paper
2 x 4" by 4" piece of watercolor paper
Watercolor paints
Brushes
Scissors/ Craft knife
Pencil
Ruler
Masking tape
Wet-on-wet
Start off by drawing a half heart on your scrap piece of paper. Make sure the paper is thicker than the normal printing paper so that the paint doesn't seep through it.
.JPG)
Fold the paper in half lengthwise and cut the heart out. This will be you heart stencil!
.JPG)
.JPG)
Place your stencil on a 5.5" x 5" piece of watercolor paper and adhere it with masking tape.
.JPG)
Mix alizarin crimson with water and paint the heart. Let it dry.
.JPG)
Now working really fast, load your brush with alizarin crimson and paint the heart leaving some areas as you go along so that the first wash shows through.
.JPG)
While the paint is still wet drop in lemon yellow, cadmium orange and cadmium red in the middle, ultramarine blue and purple lake along one of the edges.
.JPG)
Then remove the stencil and let your heart painting dry.
.JPG)
Ombre
Begin by drawing an asymmetrical heart on a scrap piece of paper. Using a craft knife cut out your heart and adhere the stencil on a 4"x 4" piece of watercolor paper.

While the paint is still wet drop in lemon yellow, cadmium orange and cadmium red in the middle, ultramarine blue and purple lake along one of the edges.
Then remove the stencil and let your heart painting dry.
Ombre
Begin by drawing an asymmetrical heart on a scrap piece of paper. Using a craft knife cut out your heart and adhere the stencil on a 4"x 4" piece of watercolor paper.
Load your brush with alizarin crimson and paint the top portion of the heart.
.JPG)
Next add cadmium red in the middle while the paint is still wet so that there's no distinct line separating the two washes. And finally add in purple lake to complete the heart.
.JPG)
.JPG)
Remove the stencil and let dry.
Striped
Make a symmetrical heart on a scrap piece of paper (like we did for wet-on-wet). Cut it out. This time we will use the cut out heart instead of the stencil.
.JPG)
Place your heart cut-out on a 4"x4" piece of watercolor paper and lightly trace around it with a pencil.
.JPG)
Using a ruler, lightly draw horizontal lines at half inch intervals.
.JPG)
Now comes the fun part...painting the stripes!
.JPG)
You can go with whatever color scheme you like. If you want distinct lines, wait for each color to dry before moving on to next.
.JPG)
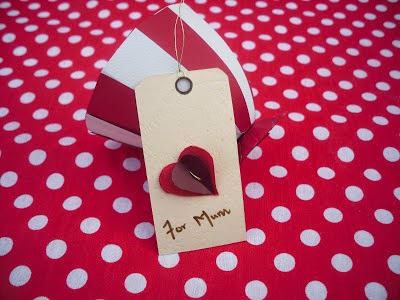
You can use these as it is with a personal message on the front/back, adhere it to a card or frame it up.
.JPG)
Get creative and have fun painting!
Next add cadmium red in the middle while the paint is still wet so that there's no distinct line separating the two washes. And finally add in purple lake to complete the heart.
Remove the stencil and let dry.
Striped
Make a symmetrical heart on a scrap piece of paper (like we did for wet-on-wet). Cut it out. This time we will use the cut out heart instead of the stencil.
Place your heart cut-out on a 4"x4" piece of watercolor paper and lightly trace around it with a pencil.
Using a ruler, lightly draw horizontal lines at half inch intervals.
Now comes the fun part...painting the stripes!
You can go with whatever color scheme you like. If you want distinct lines, wait for each color to dry before moving on to next.
You can use these as it is with a personal message on the front/back, adhere it to a card or frame it up.
Get creative and have fun painting!
Monday, February 2, 2015
Chocolate Caramel Cake
When it is your husband's birthday make it count.
.jpg)
Take the time out to make something from scratch. It may be time consuming but it is all worth it in the end.


And nothing beats this yummy super delicious chocolate goodness! The cake has two layers with lots of gooey caramel sauce and rich chocolate ganache. Yum yum yummmm!

Let's start with the cake and it's ingredients.
Chocolate cake (adapted from Matt Lewis' Classic Chocolate Layer Cake)
1 cup cocoa powder
1 tablespoon instant espresso powder
1 1/2 cups boiling water
1/2 cup melted butter
2 eggs at room temperature
2 cups all-purpose flour
1 cup caster sugar
3/4 cup brown sugar
1 1/2 teaspoon baking powder
1 1/2 teaspoon baking soda
11/2 teaspoon vanilla extract
Preheat the oven to 180C and grease two 8" round cake pans
In a bowl of boiling water dissolve your espresso powder. Add cocoa powder and whisk until smooth.
.jpg)
.jpg)
In a large bowl mix flour, sugar, baking powder and baking soda.

In a small bowl whisk eggs, butter and vanilla extract. Pour this into the cocoa mixture.

Next add your liquid mixture to the dry ingredients and whisk until smooth.


Divide the batter into two pans and bake for 30 minutes or until a toothpick inserted in center comes out clean. Cool on wire rack
TIP: I saw this on Pinterest - place a bread slice on top to keep the cake moist and prevent it from cracking!

Caramel Sauce
1/2 cup water
1 cup caster sugar
3/4 cup thickened cream
1/2 teaspoon vanilla extract
1/2 teaspoon butter
1/4 teaspoon salt
Pour water in small/medium saucepan. Add sugar in the center of the pan and turn heat to medium. Let the mixture come to a boil. Do not stir - the sugar will dissolve on its own. Gently swirl the pan if needed.
.jpg)
.jpg)
Let it cook. But keep a close eye for caramel can burn quickly. Once the color turns from light amber to dark amber it is time to remove the pan from heat.
.jpg)
Immediately add in your cream,slowly and whisk continuously. Then cook for another 2 minutes till the mixture is smooth. Turn off the heat and add in salt, butter and vanilla extract and give it a final whisk.
.jpg)
Chocolate Ganache
1 cup semi sweet chocolate
1/2 tablespoon butter (optional)
1 cup cream
Place chocolate in a heat proof bowl. Since I was short on dark chocolate, I used a mix of dark chocolate and milk chocolate.
.jpg)
Bring cream to a boil in a sauce pan over medium high heat.
.jpg)
Remove from heat and pour it over the chocolate, Cover and let it sit for a few minutes.
.jpg)
Then mix the mixture until chocolate melts and the mixture is smooth. Add butter and mix again.
.jpg)
.jpg)
.jpg)
.jpg)
Place in refrigerator for 5 minutes, give it a good stir and refrigerate again.
Now time to ASSEMBLE!
Coat one side of the cake with caramel sauce. Repeat with the second one.
.jpg)
.jpg)
Let it sit for 5 to 10 minutes then add chocolate ganache on top of caramel sauce to one of the cakes.

Stack the two together such that the caramel and ganache goodness form a nice layer between the two cakes. Then coat the whole thing with a thick layer of chocolate ganache.
p.s: If you really want to indulge in this chocolate goodness you can divide each cake into half in order to have four layers with lots of caramel sauce and layers of rich chocolate ganache in between.


The cake turned out amazing and my husband loved it! Do give it a try and enjoy the taste of caramel and ganache in every bite. xx
.jpg)

Take the time out to make something from scratch. It may be time consuming but it is all worth it in the end.
And nothing beats this yummy super delicious chocolate goodness! The cake has two layers with lots of gooey caramel sauce and rich chocolate ganache. Yum yum yummmm!
Let's start with the cake and it's ingredients.
Chocolate cake (adapted from Matt Lewis' Classic Chocolate Layer Cake)
1 cup cocoa powder
1 tablespoon instant espresso powder
1 1/2 cups boiling water
1/2 cup melted butter
2 eggs at room temperature
2 cups all-purpose flour
1 cup caster sugar
3/4 cup brown sugar
1 1/2 teaspoon baking powder
1 1/2 teaspoon baking soda
11/2 teaspoon vanilla extract
Preheat the oven to 180C and grease two 8" round cake pans
In a bowl of boiling water dissolve your espresso powder. Add cocoa powder and whisk until smooth.
In a small bowl whisk eggs, butter and vanilla extract. Pour this into the cocoa mixture.
Divide the batter into two pans and bake for 30 minutes or until a toothpick inserted in center comes out clean. Cool on wire rack
TIP: I saw this on Pinterest - place a bread slice on top to keep the cake moist and prevent it from cracking!
Caramel Sauce
1/2 cup water
1 cup caster sugar
3/4 cup thickened cream
1/2 teaspoon vanilla extract
1/2 teaspoon butter
1/4 teaspoon salt
Pour water in small/medium saucepan. Add sugar in the center of the pan and turn heat to medium. Let the mixture come to a boil. Do not stir - the sugar will dissolve on its own. Gently swirl the pan if needed.
Let it cook. But keep a close eye for caramel can burn quickly. Once the color turns from light amber to dark amber it is time to remove the pan from heat.
Chocolate Ganache
1 cup semi sweet chocolate
1/2 tablespoon butter (optional)
1 cup cream
Place chocolate in a heat proof bowl. Since I was short on dark chocolate, I used a mix of dark chocolate and milk chocolate.
Bring cream to a boil in a sauce pan over medium high heat.
Remove from heat and pour it over the chocolate, Cover and let it sit for a few minutes.
Then mix the mixture until chocolate melts and the mixture is smooth. Add butter and mix again.
Place in refrigerator for 5 minutes, give it a good stir and refrigerate again.
Now time to ASSEMBLE!
Coat one side of the cake with caramel sauce. Repeat with the second one.
Let it sit for 5 to 10 minutes then add chocolate ganache on top of caramel sauce to one of the cakes.
Stack the two together such that the caramel and ganache goodness form a nice layer between the two cakes. Then coat the whole thing with a thick layer of chocolate ganache.
p.s: If you really want to indulge in this chocolate goodness you can divide each cake into half in order to have four layers with lots of caramel sauce and layers of rich chocolate ganache in between.
The cake turned out amazing and my husband loved it! Do give it a try and enjoy the taste of caramel and ganache in every bite. xx
Subscribe to:
Posts (Atom)